原因は以下だった
is = new FileInputStream(new File(path));
↓
is = this.getClass().getClassLoader().getResourceAsStream(path);
としプロパティファイルを「src」直下に配置する
Androidでnew Fileから読み込むと自動的に先頭に「/」が付いてしまっているようでうまくプロパティファイルが読み込めていなかった
is = new FileInputStream(new File(path)); ↓ is = this.getClass().getClassLoader().getResourceAsStream(path);としプロパティファイルを「src」直下に配置する
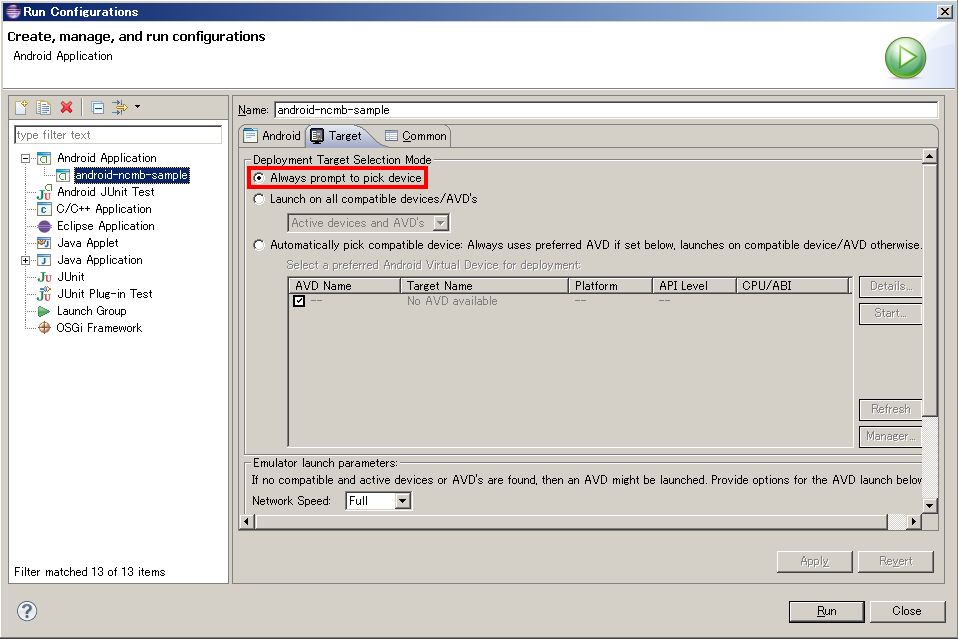
at com.google.android.gcm.GCMRegistrar.checkDevice(GCMRegistrar.java:98)実機にアプリを直接インストールして確かめる必要があります
eclipse -> プロジェクトを右クリック -> Export -> Export Android Application -> デスクトップに保存 -> apkファイルをGmailに添付して送信 -> Android端末で送信したGmailを受信 -> apkファイルをクリック -> アプリをインストール


C:\myinstallprogram\adt-bundle-windows-x86_64-20131030\sdk\extras\google\usb_driver先ほどGoogle USB Driverをインストールしたの以下のパスが存在しています(インストールしていない状態だとパスが存在しません)

db.hogeCollection.update({"_id":"abcdefg"},{$set:{"number":NumberInt(1000000000)}}, false, true);
mysql -u [username] -p [dbname] -h [rdb_ip_address][username], [dbname], [rdb_ip_address] の部分にはDBサーバー作成時に設定したユーザ名、DBの名前、DBサーバーのIPアドレスを入力します
DBUser=[username]
DBHost=[rdb_ip_address]
DBPassword=DBサーバー作成時に設定したパスワード
$DB["USER"] = '[username]';
$DB["SERVER"] = '[rdb_ip_address]';
$DB["PASSWORD"] = 'DBサーバー作成時に設定したパスワード';
<source>
  type tail
  format syslog
  path /var/log/messages
  tag log.messages
</source>

<match log.messages>
  type forward
  flush_interval 5s
  <server>
    name server_host_name
    host server_host_name
    port 24224
    weight 60
  </server>
</match>
<source>
  type forward
  port 24224
</source>

<match log.messages>
  index_name messages
  logstash_format true
  type elasticsearch
  host server_host_name
  port 9200
  include_tag_key true
  tag_key _key
  flush_interval 10s
</match>
include_tag_key を true にするとelasticsearchにログを突っ込む際にmatchに合致したタグ情報を自動で付与してくれます
format /^(?<timestamp>\w{3} \d{2} \d{2}:\d{2}:\d{2}) (?<host>[^ ]*) (?<body>.*)$/
こんな感じで自分でパースしてelasticsearchに渡すとうまくtimestampをパースしてくれませんcurl -X POST 'http://server_host_name:9200/messages'サーバ側のfluent.confに記載してあるindex_nameと同じindexを作成してください
curl -X PUT http://server_host_name:9200/messages/fluentd/_mapping -d '{
  "app_log" : {
    "properties" : {
      "host" : {"type" : "string"},
      "body" : {"type" : "string"},
      "timestamp": {"format" : "MMM dd HH:mm:ss","type" : "date", "locale" : "ja_JP"}
    }
  }
}'
{
    "require": {
        "aws/aws-sdk-php": "2.*"
    }
}
WARNING: channel "pear.php.net" has updated its protocols, use "pear channel-update pear.php.net" to update
Loading composer repositories with package information
Installing dependencies (including require-dev)
  - Installing symfony/event-dispatcher (v2.4.0)
    Downloading: 100%

  - Installing guzzle/guzzle (v3.7.4)
    Downloading: 100%

  - Installing aws/aws-sdk-php (2.4.11)
    Downloading: 100%

symfony/event-dispatcher suggests installing symfony/dependency-injection ()
symfony/event-dispatcher suggests installing symfony/http-kernel ()
aws/aws-sdk-php suggests installing doctrine/cache (Adds support for caching of credentials and responses)
aws/aws-sdk-php suggests installing ext-apc (Allows service description opcode caching, request and response caching, and credentials caching)
aws/aws-sdk-php suggests installing monolog/monolog (Adds support for logging HTTP requests and responses)
aws/aws-sdk-php suggests installing symfony/yaml (Eases the ability to write manifests for creating jobs in AWS Import/Export)
Writing lock file
<?php
require 'vendor/autoload.php';
use Aws\Sqs\SqsClient;

$client = SqsClient::factory(array(
  'key'    => 'your access key',
  'secret' => 'your secret access key',
  'region' => 'us-west-2'
));

echo 'ListQueues' . "\r\n";
$result0 = $client->listQueues(array(
  'QueueNamePrefix' => 'string',
));
$result0->get('QueueUrls');
var_dump($result0);

$result1 = $client->createQueue(array(
  'QueueName' => 'kaka_queue002',
  'Attributes' => array(
    'VisibilityTimeout' => '300',
  ),
));
$queueUrl = $result1->get('QueueUrl');
echo $queueUrl . "\r\n";

$result2 = $client->sendMessage(array(
  'QueueUrl' => $queueUrl,
  'MessageBody' => 'test message !',
  'DelaySeconds' => 0,
));

echo 'ReceiveMessage' . "\r\n";
$result3 = $client->receiveMessage(array(
  'QueueUrl' => $queueUrl,
  'MaxNumberOfMessages' => 10,
  'WaitTimeSeconds' => 20,
));
$body = $result3['Messages'];
echo $body[0]['Body']. "\r\n";
#var_dump($result3);

echo 'OK';
?>
Composer version 80499bb02418711b34bba59c1a6d8032429e5702 2013-12-06 12:32:19
server = servernamepuppetmasterd --no-daemonize --d
file { '/etc/hosts':
    owner => 'root',
    group => 'root',
    mode  => 644,
}
※.ppファイルの名前が「site」でないとうまく動作しない可能性がありますsyntax enable set background=dark colorscheme solarized let g:solarized_termcolors=256
alias ls='gls --color=auto'
eval $(gdircolors /var/tmp/dircolors-solarized/dircolors.ansi-universal)
source ~/.bash_profile
extension=mongo.so
<?php
new MongoClient("mongodb://dbserver:27017");
?>
8967:20131204:171621.274 item [db_server:mikoomi-mongodb-plugin.sh[-h {$SERVER} -p {$PORT} -z {$HOSTNAME}]] became supported
的なログが出力されれば完了ですyum -y install apachetopでインストールしてください(CentOS 6.3の場合)